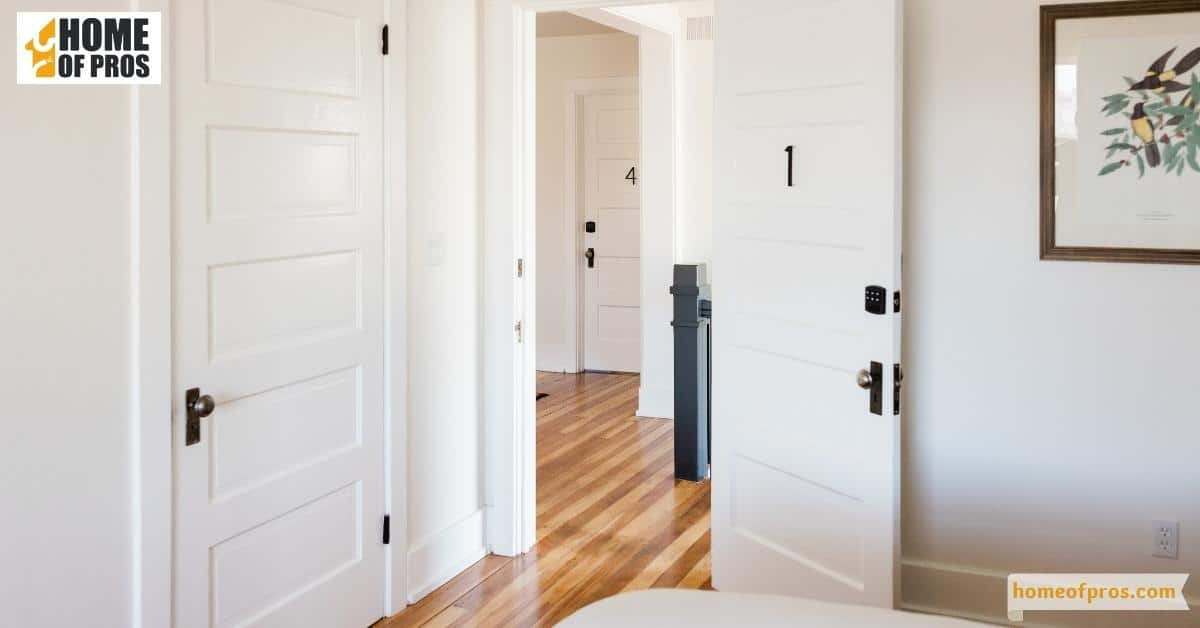
Replacing an interior slab door may seem like a daunting task, but with the right tools and guidance, it can be a rewarding project. Whether your current door is damaged, or you’re simply craving a new look, learning to replace an interior door slab yourself can save you a hefty sum compared to hiring a professional.
To replace an interior slab door, first, remove the old door, then mark the doorknob hole on the new door. Outline and cut the hinge mortises, clear the mortises, and install the hinges. Next, mount the door to the frame. Position the doorknob template and cut the doorknob hole and latch hole. Mount the doorknob and latch, and make final adjustments to ensure the door swings and closes properly. If you’re not comfortable with these tasks, hire a professional to ensure safety and accuracy.

What Is a Slab Door?
A slab door is a basic, stripped-down door that typically comes without any pre-cut holes, hardware, or frame. Essentially, it’s a blank slate allowing for complete customization based on your specific needs and preferences. These doors can be made of various materials like wood, steel, or fiberglass and are available in a wide array of styles and finishes.
They offer a unique advantage in that they can be trimmed to fit any door opening, making them versatile for unique or non-standard door sizes. Slab doors provide a cost-effective option for those looking to replace doors in their home.
Equipment / Tools
Before you begin, make sure you have all the necessary tools and supplies. The following items will be needed to replace your slab door:
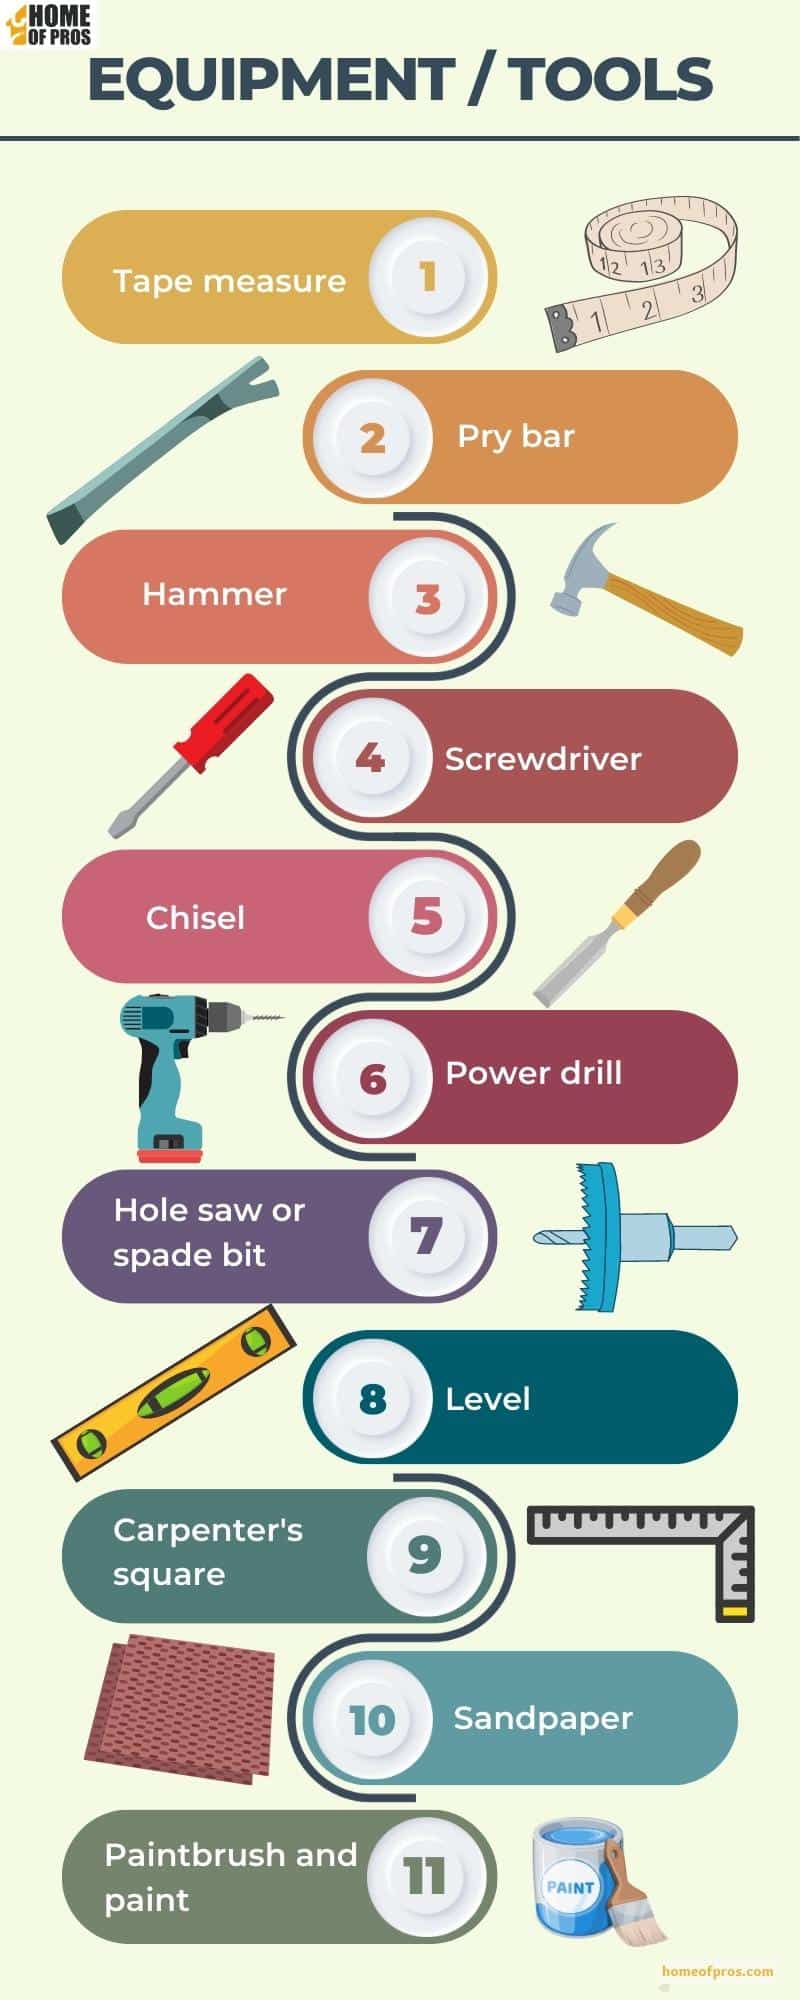
- Tape measure: Measure the dimensions of the existing door and the door frame to ensure a proper fit.
- Pry bar: Use a pry bar to remove the existing door from the hinges and frame.
- Hammer: A hammer will come in handy for removing any nails or screws holding the door in place.
- Screwdriver: Use a screwdriver to loosen and remove the hinges from the frame and door.
- Chisel: A chisel helps in removing any excess wood or paint from the door frame for a smooth installation.
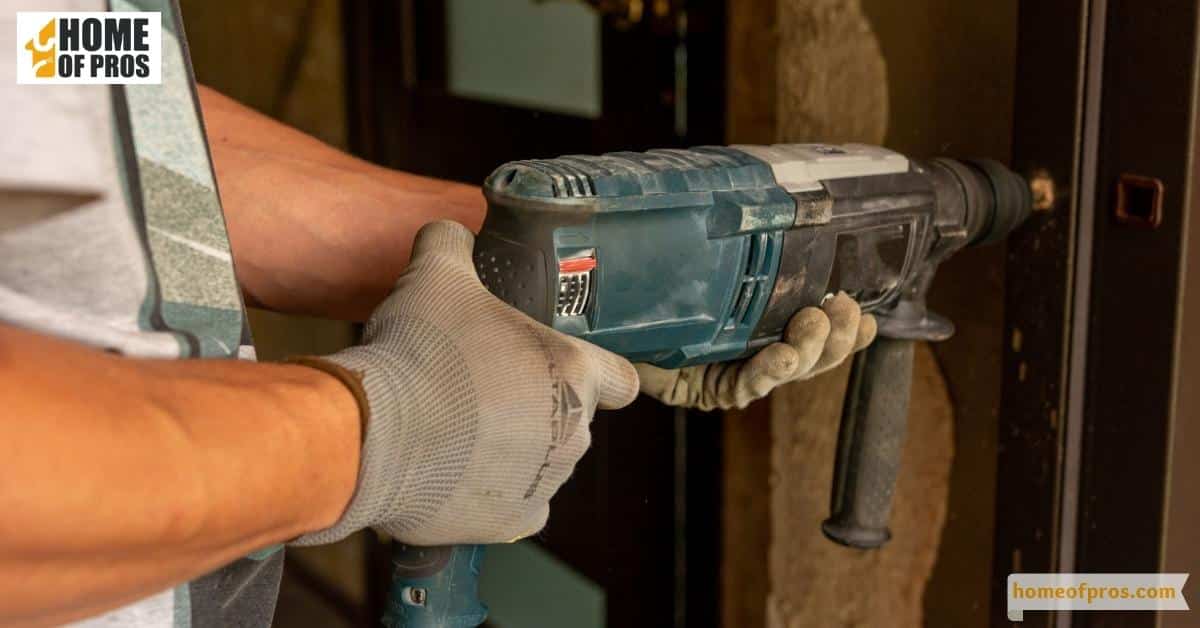
- Power drill: You’ll need a power drill to install the new door hinges and handle.
- Hole saw or spade bit: Use a hole saw or spade bit to create holes for the doorknob and latch plate.
- Level: A level ensures that the door is installed correctly and is not leaning or uneven.
- Carpenter’s square: A carpenter’s square helps in ensuring that the door and frame are properly aligned.
- Sandpaper: Sandpaper is useful for smoothing out any rough edges or imperfections on the door and frame.
- Paintbrush and paint: If desired, you may want to paint the new door before installing it to match your interior decor.
Materials
In addition to the tools listed above, you’ll also need some materials in order to complete your door replacement. Here are a few of the common items you’ll want to have on hand:
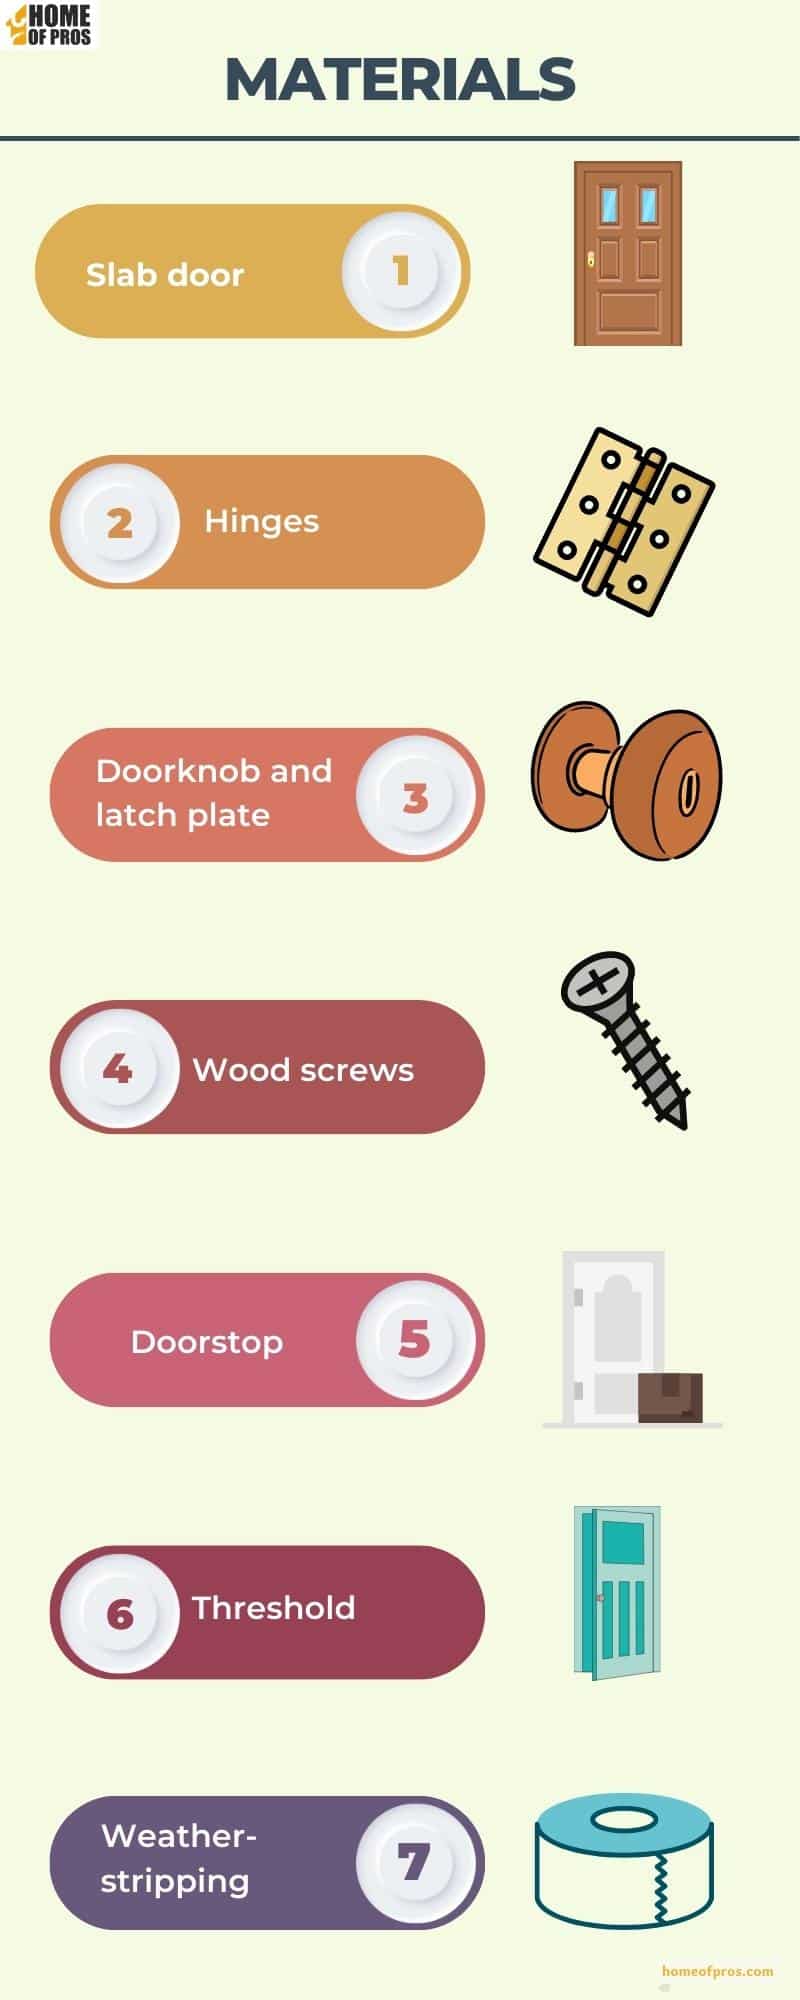
- Slab door: Choose a slab door that is the same size as the existing door and fits properly within the frame.
- Hinges: You will need three hinges for a standard-sized door.
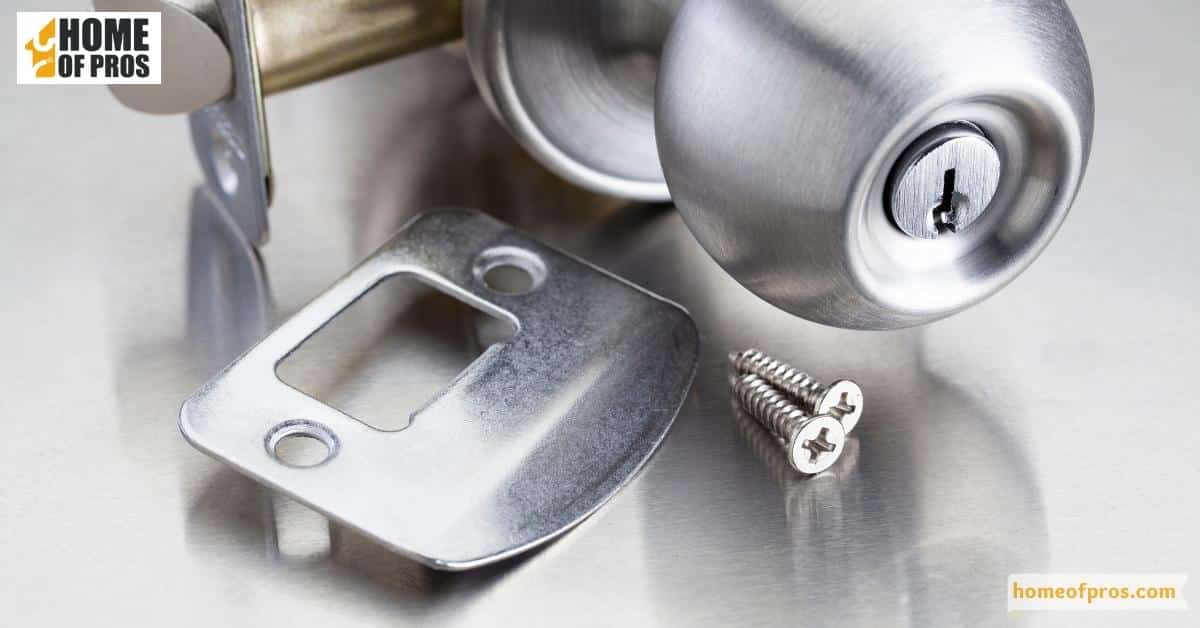
- Doorknob and latch plate: Choose a doorknob and latch plate to match the style of your home.
- Wood screws: You’ll need wood screws to mount the hinges and handle onto the door frame.
- Doorstop: A doorstop is used to create an even gap between the door and frame.
- Threshold: A threshold is used to provide a seal at the base of an interior door.
- Weatherstripping: Weatherstripping helps minimize air drafts and improve energy efficiency in your home.
Steps to Replace an Interior Slab Door
Now that you have all of the necessary tools and materials, follow these steps to replace your interior slab door:
1. Remove the Old Door
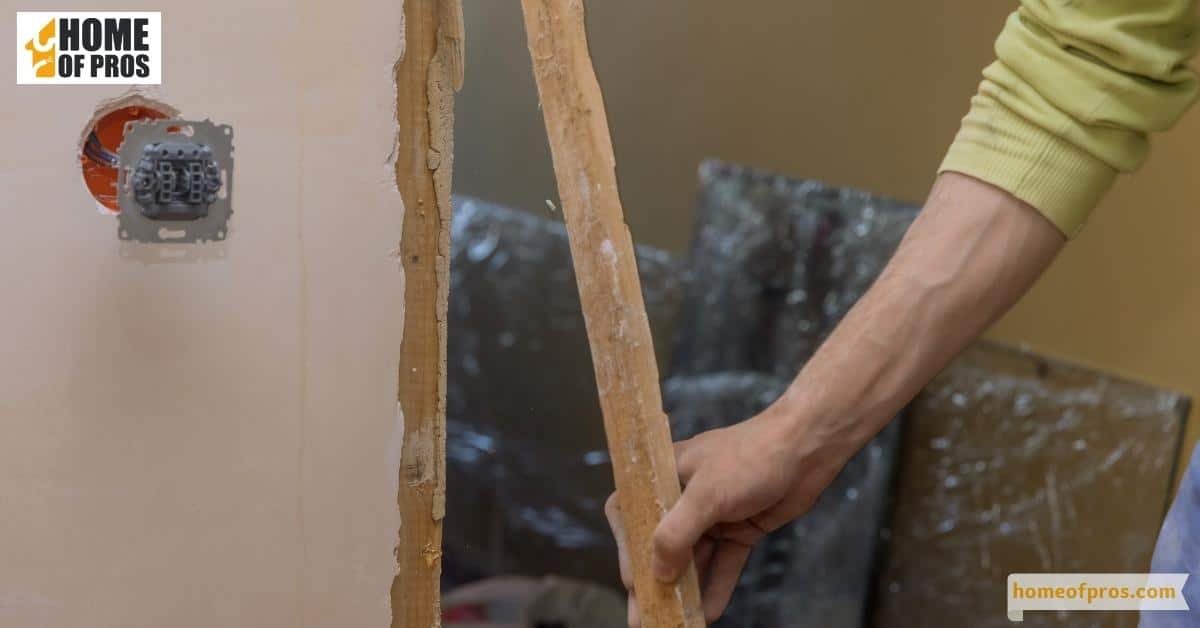
Start by removing the old door. Unscrew the hinges from the door frame using your screwdriver. If the door is painted or sealed to the frame, use a utility knife to cut along the edge of the door frame to prevent tearing the paint or finish.
Once the hinges are removed, gently lift the door off of the frame. It’s often helpful to have a friend assist with this step to prevent the door from falling and causing injury. Be sure to place the old door in an area where it won’t be in the way.
2. Mark the Doorknob Hole
Next, you’ll need to mark the location of the doorknob hole on your new slab door. To do this, measure the distance of the doorknob hole from the top and side of your old door. Transfer these measurements onto the new door ensuring precision for a good fit.
Make a clear mark at the intersection of these measurements. This will serve as the guide for drilling the doorknob hole. Remember, accuracy is key here; an incorrectly placed doorknob can affect the functionality of your door.
3. Outline the Hinge Mortises
After marking the doorknob hole, the next step is to outline the hinge mortises for your new door. Using your old door as a reference, measure the position, size, and depth of the hinge mortises. Neatly transfer these measurements onto the edge of your new door slab.
Be sure to align the top and bottom hinges with those on the door frame. With a carpenter’s pencil, clearly outline the areas where you’ll cut the mortises. These outlines serve as your cutting guide, helping to ensure that your hinges fit perfectly into the door.
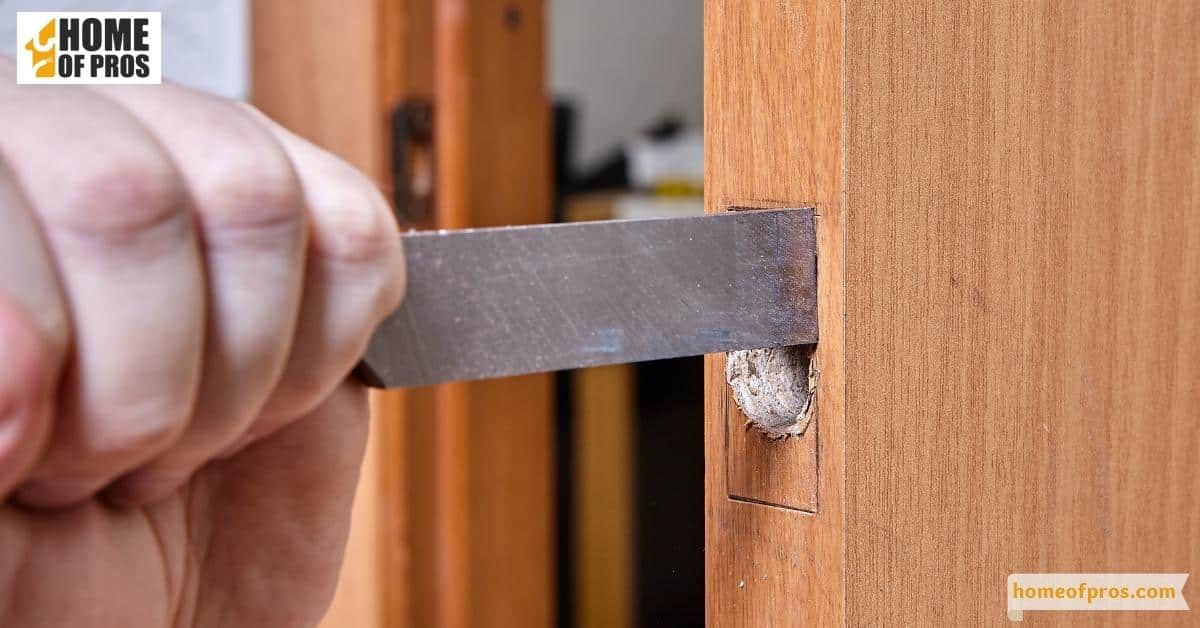
4. Cut the Mortise Outlines
Once you’ve outlined the mortises, it’s time to cut them out. Using a sharp chisel, carefully carve along the marked outlines on your door slab. Aim to make the depth of the mortises match that of the old door.
Take your time during this step to prevent accidental over-cutting, as this could result in loose hinges. Remember, it’s better to cut less and adjust later. Clean out the wooden chips from the carved mortises, ensuring a smooth surface for the hinges to sit properly.
5. Clear the Mortises
After cutting the mortises, it is paramount to clear all the wooden debris left behind in the hollowed areas. This step is crucial in ensuring a smooth and flush fit for your door hinges. Use a small chisel and hammer to remove any remaining wood chips or splinters in the mortises.
Validate that the hollowed spaces are clean and deep enough by fitting the hinges into the mortises. If the hinges don’t fit properly, make necessary adjustments to the mortises until you achieve a perfect fit.

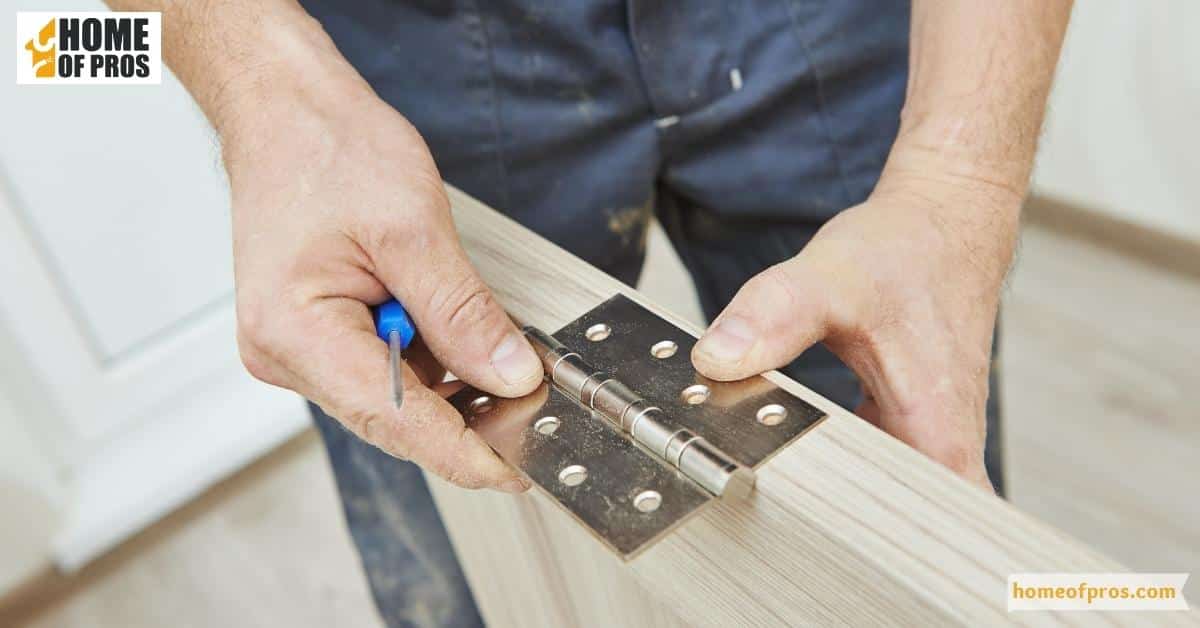
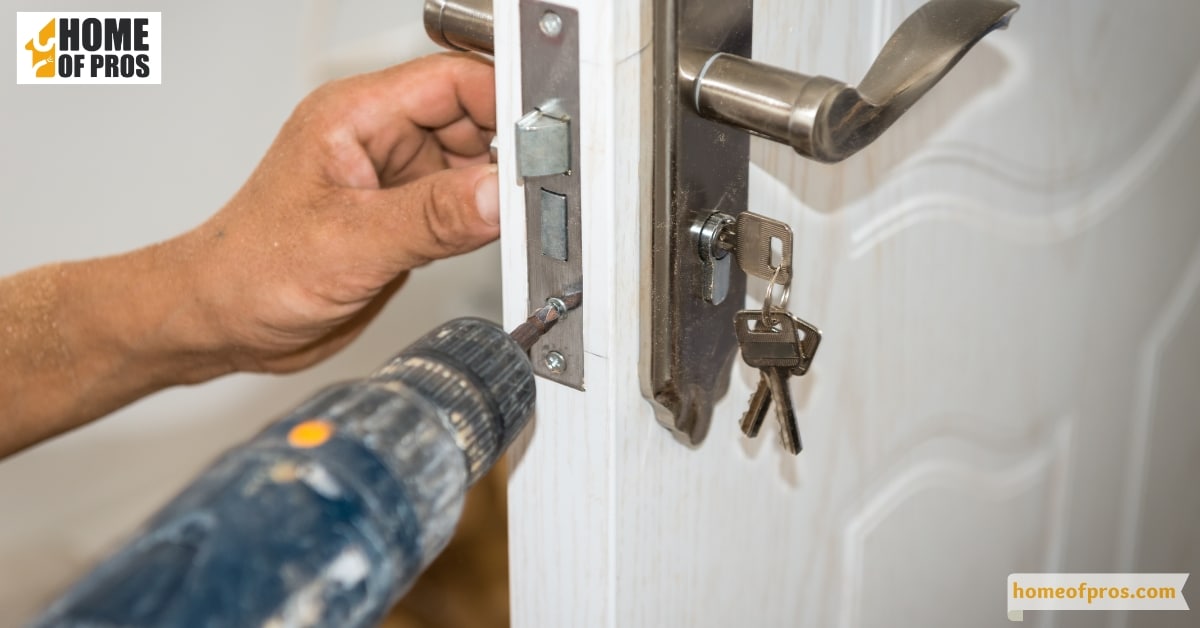
6. Install the Hinges
Now that your mortises are prepared, it’s time to install the hinges. Position your hinges in the mortises ensuring they fit flush with the edge of the door. They should sit perfectly flat without any gaps between the hinge and the door surface. Use a pencil to mark the screw holes.
Remove the hinge, pre-drill the screw holes to prevent splitting the wood, then secure the hinge with screws. Ensure all screws are tight but be careful not to over-tighten, as this could warp the hinge or damage the door. Repeat this process for all hinges.
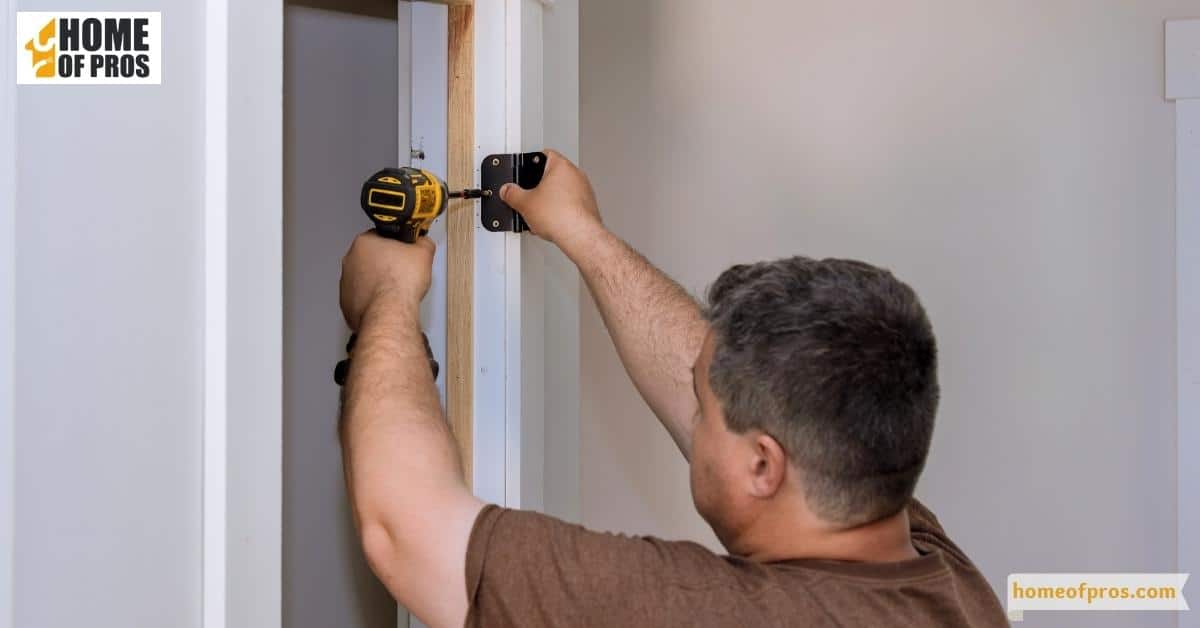
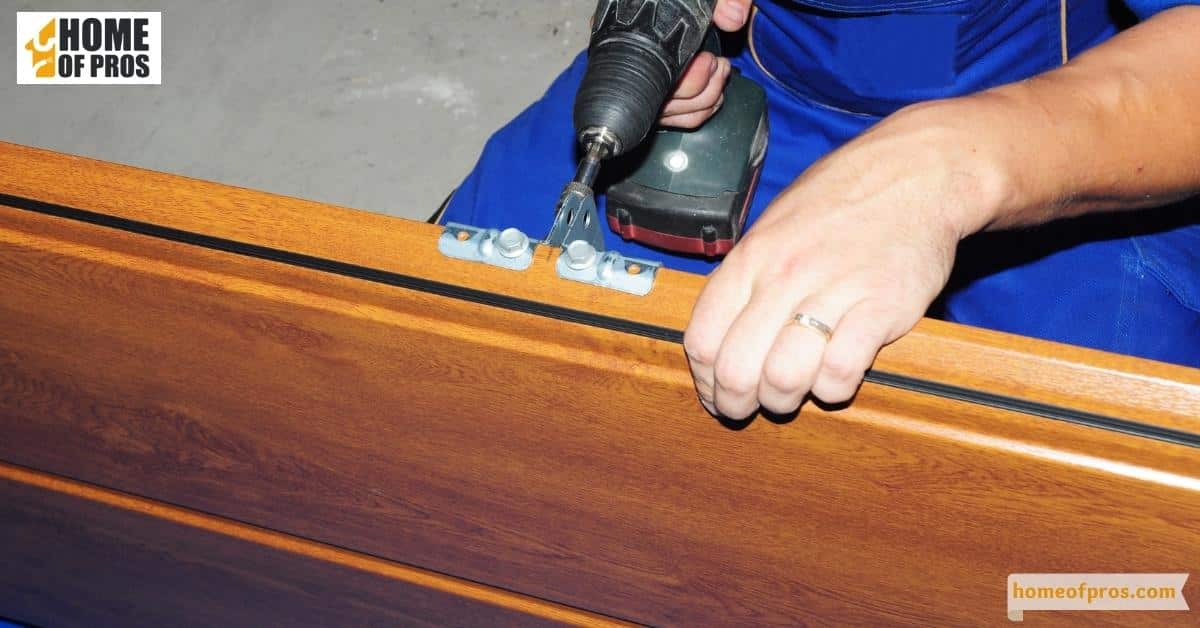
7. Mount the Door to the Frame
With the hinges installed, it’s time to mount the door to the frame. Align the hinges on the door with the hinge mortises on the door frame. Ask a friend to hold the door in position while you screw the hinges into the door frame.
Ensure the door is level and swings open and closed easily. If it’s not, make the necessary adjustments. Once the door is properly mounted and operating smoothly, you’ve completed the hardest part of this process.
8. Position the Doorknob Template
Next is positioning the doorknob template. The template, usually provided with your doorknob, guides you in accurately drilling the latch and doorknob holes. Align the template with the doorknob hole mark you made earlier.
Make sure it’s level and in the correct place before you tape it down. The template should indicate where to drill the holes. This step is crucial for properly aligning the doorknob with the latch hole, ensuring smooth operation of your door.
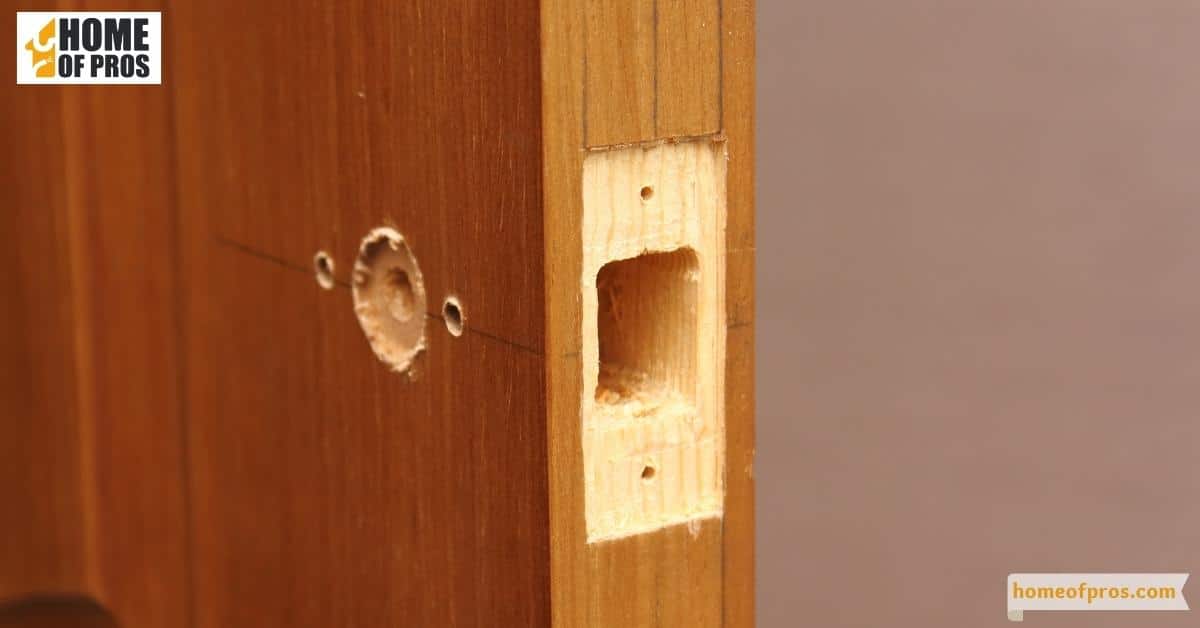
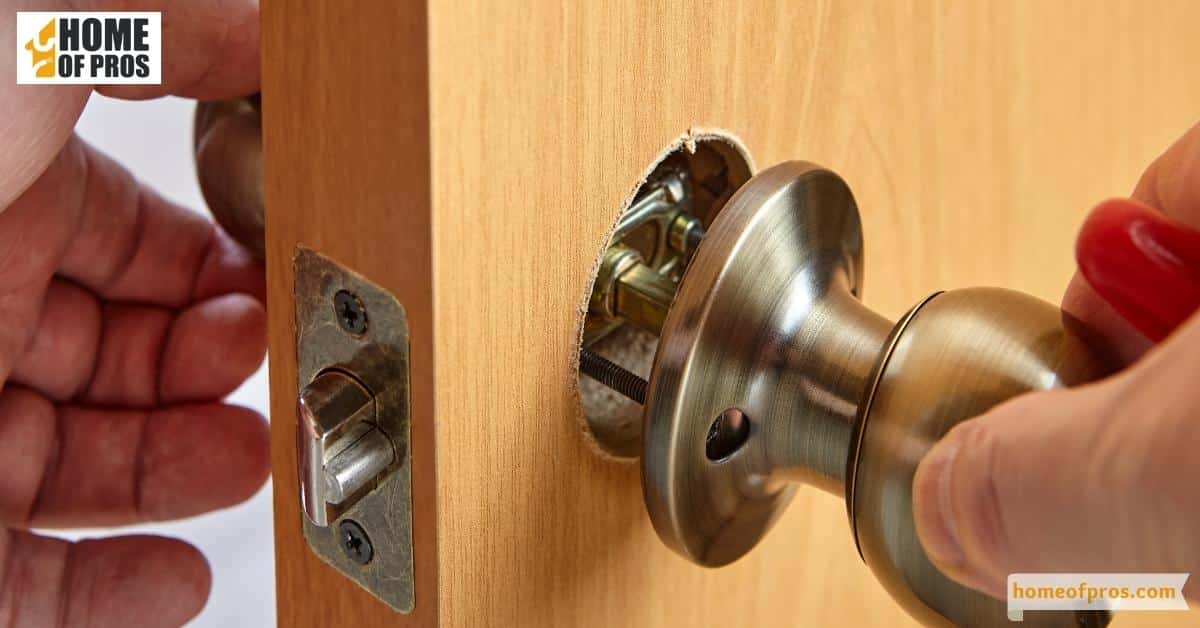
9. Cut the Doorknob Hole and Latch Hole
Once the template is correctly positioned, it’s time to cut out the doorknob and latch holes. Using a hole saw or spade bit, drill through the door at the indicated spots on the template. Go slowly to avoid splitting or damaging the door.
After cutting the doorknob hole, repeat the same process for the latch hole on the door edge. Remember to align the latch hole with the center of the doorknob hole. Clean out any leftover debris from the holes for a neat finish.
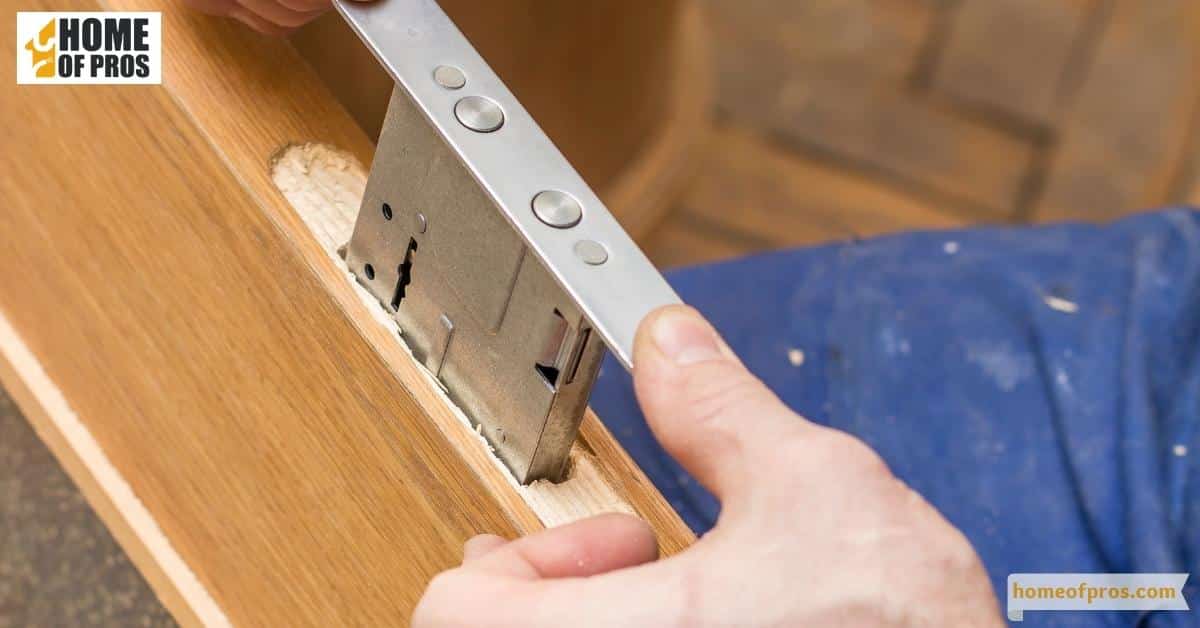
10. Mount the Doorknob and Latch
With your doorknob and latch holes prepared, it’s now time to mount the doorknob and latch into place. Insert the latch into the latch hole and secure it with screws. Next, align the spindle of the doorknob with the hole in the latch and attach the two halves of the doorknob on either side of the door.
Screw them together tightly but ensure the knob turns freely. This step brings you closer to having a fully functioning door.
11. Make Final Adjustments
Once the doorknob and latch are in place, you’re almost done. The final step is to make any necessary adjustments. Check the door’s swing and if it closes properly. The door should close smoothly without any gaps. If it sticks, check the hinges and latch for proper installation.
When to Call a Professional
While replacing an interior slab door can be a rewarding DIY project, there are times when enlisting the help of a professional may be necessary. If you’re dealing with a non-standard door size, intricate hardware, or complex adjustments, a professional can ensure the job is done right.
Furthermore, if you’re not comfortable with the tasks involved, such as using power tools or making precise measurements, hiring a professional can save you time and stress. Remember, it’s always important to know your limits and when to seek help, keeping safety as a top priority.
In conclusion
Replacing an interior slab door is a project that requires precision, patience, and the right tools and materials. However, with this comprehensive guide, we hope we’ve made the task less daunting and more accessible. By following the outlined steps, you can breathe new life into your space and experience the satisfaction of a job well done.
Remember, while DIY projects can be rewarding, don’t hesitate to call a professional when needed. Either way, your primary goal should always be a safely installed door that enhances the functionality and aesthetics of your home. Happy DIY-ing!